Digital Halftoning
Introduction
Halftoning is the representation of different shades of gray by suitably
placed black marks on white paper. Because of the low-pass spatial-frequency
properties of the human eye, the dots become invisible if they are close
enough together.
Digital halftoning means deciding how to place the dots by using
computer algorithms,
as opposed to the old-fashioned analog methods (mostly photographic).
The netpbm package contains a program to do this, called
pgmtopbm.
The man page for pgmtopbm says that Robert Ulichney's
book “Digital Halftoning” is the standard reference on this
subject; and indeed, it's a fine book. However, it doesn't deal
extensively with the transfer function of real printers; we must deal with
this problem
separately.
pgmtopbm
One very confusing feature of pgmtopbm is that it doesn't convert
a standard displayable PGM image directly to a halftone.
That's because the PGM standard calls for the image data to be compensated
for the nonlinearity of a standard monitor display (see the discussion of
gamma). Instead, it tacitly assumes that the
input data are proportional to the reflectance of the printed image.
That is, a uniform gray area with data values of 127 (nearly half of the
maximum 255) will be transformed into a halftone in which about half the
pixels are white and half are black.

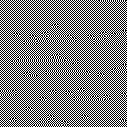
 For example, here are (from left to right) just such a gray square, with
all data values equal to 127; its default conversion by pgmtopbm
to a mixture of black (50.2% of the pixels) and white (49.8%) pixels with
pgmtopbm; conversion using pgmtopbm's -hilbert
option; and a gamma-corrected version of intensity 127/255 as bright as
pure white, which ought to appear about as bright as the two squares to
its left.
You can see that the halftoned versions are much lighter than the original
image, and about the same average brightness as the gamma-corrected
version at the extreme right of the row of squares.
For example, here are (from left to right) just such a gray square, with
all data values equal to 127; its default conversion by pgmtopbm
to a mixture of black (50.2% of the pixels) and white (49.8%) pixels with
pgmtopbm; conversion using pgmtopbm's -hilbert
option; and a gamma-corrected version of intensity 127/255 as bright as
pure white, which ought to appear about as bright as the two squares to
its left.
You can see that the halftoned versions are much lighter than the original
image, and about the same average brightness as the gamma-corrected
version at the extreme right of the row of squares.
I have to say “about”, because most computer monitors have a
problem analogous to that of laser printers: the image is made up of
overlapping dots
instead of distinct square pixels.
(The main difference here is that the dots are light instead of dark.)
Unless you have a well-adjusted LCD screen, you probably won't see the
same brightness on the three right squares above.
But, in any case, you should see the middle (halftoned) squares closer in
color to the extreme right square than to the extreme left one.
Halftoning algorithms
Floyd-Steinberg
The pgmtopbm program contains several algorithms.
The default is “boustrophedonic Floyd-Steinberg dithering”
— a mouthful in any language. But the basic idea is very simple:
the grayscale image is scanned (alternately from left to right, and
right to left), and the program compares the current input gray value
with a weighted mean of the differences (“errors”) between
the printed dots and the gray values in a small region around the current
point. When the printing falls half a dot below the integrated grayness
(so to speak), another dot is printed. Any remaining surplus or deficit
is carried forward, to keep the average gray level correct. The idea
is that the accumulated error should never exceed half a black pixel.
Because of the accumulated-error accounting, this type of halftoning is
also known as “error diffusion”. As explained in Ulichney's
book,
it tends to produce regular patterns that can appear quite distracting
at some gray levels.
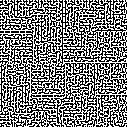
Another drawback is the production of occasional “glitches” in
an otherwise uniform area; you can see such artifacts in the second
square above.
A more serious problem, in our situation, is the isolation of single
white pixels that are completely surrounded by black ones, when the gray
level is near or below half-maximum brightness.
Because of the
overlapping-dot
problem, Floyd-Steinberg makes pictures that print much too
dark on a laser printer.
Hilbert-curve
The man page for pgmtopbm suggests the
Hilbert-curve method to mitigate this problem. This is a modification of
Floyd-Steinberg; instead of simply tracing along the rows of the
image, the program follows a space-filling curve, laying down clumps of
pixels instead of isolated ones. (The default clump size is 5 pixels, but
you can select other sizes.)
Indeed, this alleviates the problem somewhat (see the third square in the
row above).
But we have traded a big loss in resolution for a modest improvement in
grayscale rendition. The picture now looks quite grainy.
Furthermore, the Hilbert-curve method still tends to produce distracting
patterns in the halftoned image. And the grayscale rendition, while much
improved, is still not completely correct.
Other methods are available; but you begin to see that there's
more
to this problem than just selecting a dithering algorithm.
Copyright © 2006 – 2008, 2012 Andrew T. Young
Back to the . . .
introduction to image scanning
or the
GF home page
or the
website overview page