 Call that version circle1.eps. Adding the BoundingBox comment
has increased the size, but it's still only 103 bytes long.
Here's what it looks like in the
Gimp, magnified 3× to show the individual pixels:
Call that version circle1.eps. Adding the BoundingBox comment
has increased the size, but it's still only 103 bytes long.
Here's what it looks like in the
Gimp, magnified 3× to show the individual pixels:
For most purposes, the most compact graphics format is PNG (Portable Net Graphics) — an excellent replacement for the common GIF format. But there are many ways to get from PS to PNG, some better than others. The most obvious ways, such as using the convert command, or the Gimp, have problems. So this page discusses the transformation of PS to PNG.
Here's a trivial example of a hand-coded PS file that draws a circle:
%!PS

300 300 50 0 360 arc stroke	% raw PS to draw a circle.

showpage
I'll call this 72-byte file circle1.ps. If you display it with the Gimp, you get the image of a whole sheet of paper, with the circle below and to the left of center.
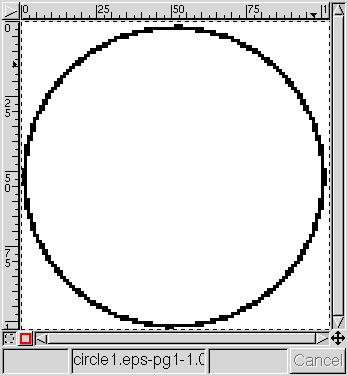
That usually isn't what you want: just the circle, omitting the rest of the page. An easy way to fix this is to add the BoundingBox comment, which makes the file Encapsulated PostScript (EPS):
%!PS
%%BoundingBox: 249 249 351 351

300 300 50 0 360 arc stroke     % raw PS to draw a circle.

showpage
Call that version circle1.eps. Adding the BoundingBox comment
has increased the size, but it's still only 103 bytes long.
Here's what it looks like in the
Gimp, magnified 3× to show the individual pixels:
You can see from the scales that I told Gimp to use 72 dpi and not its default 100. The “jaggies” show that I told it to omit anti-aliasing as well. [Note that gs (and hence gimp) has separate anti-aliasing controls for text and graphics.]
The 50-point (and here, -pixel) radius makes the circle follow a path 100 pixels in diameter. But as PostScript's default 1-point linewidth was used, that makes the stroked path half a pixel wider on each side. As there is no such thing as a half-pixel, that drags in an extra whole pixel all around, making the BoundingBox 102 pixels on a side (as you can see from the BB comment above.)
It would be tempting to just ask gimp to save this image as a PNG file at this point. You could do that; but (as Richard Nixon said) it would be wrong. What you get is not a 102×102 PNG file, but (according to identify) a 103×103 PNG image. I suppose the extra pixel is due to a fencepost error somewhere in GIMP version 1.2.3, which is the Debian woody version.
You can get rid of the extra pixels by asking the Gimp to autocrop the image, before saving it as a PNG file. But that makes a lot of operations to keep track of manually: setting the dpi value, making sure the right aliasing (or none) is used in interpreting the EPS file; and working down through the menus to the “autocrop” item. Forget one, and you've messed up the image.
The natural thing to try next is ImageMagick's convert command:
convert circle1.eps circle1.png
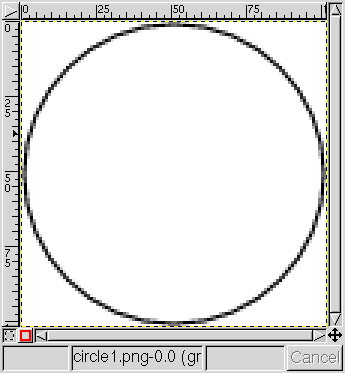 produces a 102×102 image, all right; but it looks like this (as
displayed by Gimp and enlarged, again):
produces a 102×102 image, all right; but it looks like this (as
displayed by Gimp and enlarged, again):
Now we have anti-aliasing shades of gray, which may or may not be what we want. Because of the added gray shades, this file isn't very compact: 738 bytes, even after optimizing with pngcrush.
Furthermore, the anti-aliasing provided by convert may be
different from what gimp provides. That's because gs,
the underlying PS engine for both, offers two levels of anti-aliasing.
While gimp may use either 2-bit (which it calls “weak”)
 — see the image at the left —
or 4-bit anti-aliasing (which it calls “strong”), convert
uses only the 4-bit version. [See the TextAlphaBits
and GraphicsAlphaBits device parameters described in the
Language.htm documentation file for gs.]
— see the image at the left —
or 4-bit anti-aliasing (which it calls “strong”), convert
uses only the 4-bit version. [See the TextAlphaBits
and GraphicsAlphaBits device parameters described in the
Language.htm documentation file for gs.]
There are supposed to be options to convert to make it turn off anti-aliasing, but they don't seem to work. (See Debian bug #310664.)
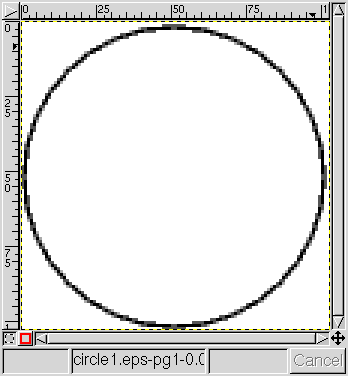
As the obvious things don't work correctly, we have to fall back on the rather tedious set of options to pstopnm described on the PS-conversions page:
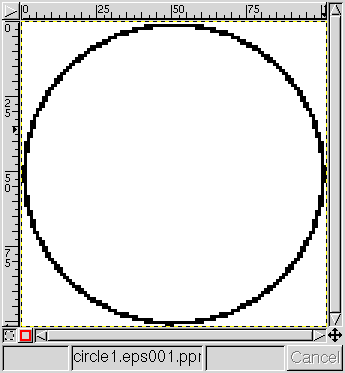 That writes a file called circle1.eps001.ppm, which the Gimp
displays like this:
That writes a file called circle1.eps001.ppm, which the Gimp
displays like this:
That's almost the same as the display of the original PostScript file; there are a couple of black pixels missing at the top of the circle, however.
To fix the missing-pixel problem (which is probably due to a bug in version 6.53 of gs), we have to tweak the EPS file a little. First, we have to translate the circle to the lower left corner of the page, by adding
-249 -249 translate % move to lower left corner
to the PostScript. Then, we have to tell the PS interpreter that the page size is just 102×102 pixels; we do this by putting
<< /PageSize [ 102 102 ] /ImagingBBox null >> setpagedevice
before the translate operation. So now the EPS file is:
%!PS
%%BoundingBox: 0 0 102 102

<< /PageSize [102 102] /ImagingBBox null >> setpagedevice

-249 -249 translate     % move to lower left corner

300 300 50 0 360 arc stroke	% raw PS to draw a circle.

showpage
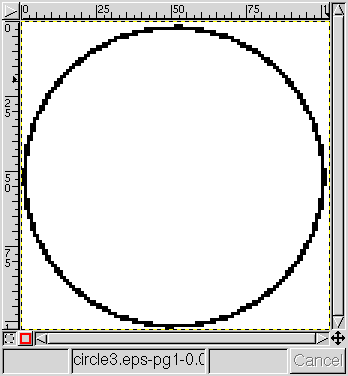 Let's call this circle3.eps. It's now up to 250 bytes, because
of the added PS code.
The Gimp displays it as shown at the right; notice that the missing pixels
at the top are correctly restored in this version.
Let's call this circle3.eps. It's now up to 250 bytes, because
of the added PS code.
The Gimp displays it as shown at the right; notice that the missing pixels
at the top are correctly restored in this version.
Now the command line
produces a file called circle3.eps001.ppm, which can be converted to a PNG image by passing it through pnmtopng:
which has the required dimensions of 102×102 pixels. And the file size is only 374 bytes (which could be reduced a little more with the help of the pngcrush command).
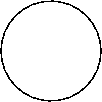 The final result, displayed (without enlargement) at the left, looks as
good as can be expected, considering the slightly granular appearance
produced by the aliasing noise.
Notice that this circle is only about an inch across — smaller than
it would appear if printed on paper by a PostScript printer — because
computer monitors typically display about 100 pixels per inch, not 72.
The final result, displayed (without enlargement) at the left, looks as
good as can be expected, considering the slightly granular appearance
produced by the aliasing noise.
Notice that this circle is only about an inch across — smaller than
it would appear if printed on paper by a PostScript printer — because
computer monitors typically display about 100 pixels per inch, not 72.
We could have made the aliasing less visible by choosing a linewidth greater than 1 pixel, of course. Normally, that would be done in any reasonable graphic anyway: a 1-pixel linewidth is just too thin to look good on a computer screen.
If you look at the enlarged version, you'll see that the lumpy appearance of the line is due to alternate sections 1 and 2 pixels wide. If we increase the average width just enough to eliminate the 1-pixel segments, this factor-of-two variation in displayed width will disappear. (There might be a few bits that are 3 pixels wide; but a 3:2 ratio is less obvious than 2:1.)
It turns out that the magic width to do this is close to the square root of 2. If we add the line
1.4 setlinewidth
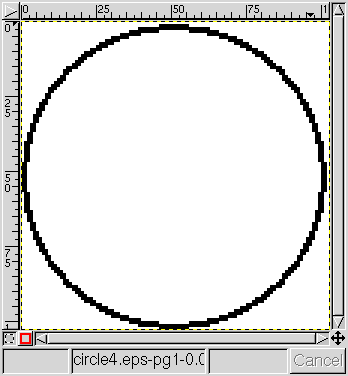 to the EPS file, just before the arc operation,
the Gimp shows the appearance shown at the right,
with our customary 3x enlargement:
to the EPS file, just before the arc operation,
the Gimp shows the appearance shown at the right,
with our customary 3x enlargement:
You can see that the average width of the line is now 2 pixels, all around
the circle. After conversion by pstopnm and pnmtopng,
and without enlargement, the circle looks like this:
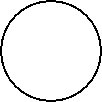
Not bad, considering that no anti-aliasing was used! And, because of the more uniform linewidth, the image has compressed better: it's now only 357 bytes.
Notice that the rasterized versions of the image are always considerably bigger than the vector PS files they came from. Still, with optimized compression, that's only a little larger — usually, less than a factor of 2. If we had stored the images as uncompressed raster graphics, they would have been very much larger. Even a bitmap would be 102×102/8 = 1300 bytes. And a PPM full-color file of 102×102 3-byte pixels would be 31 kB — nearly a hundred times larger than the PNG version here.
A related problem, especially for line drawings of the kind shown here, can arise if you need to convert PNG images back to PS. In general, there's no accurate way to convert bitmapped images (like PNG) to vector graphics. So you're stuck with one of the PostScript raster-image formats. But you can end up with excessively large PS files if you fail to use the most compact possible PNM format as an intermediary: PBM for line drawings, or PGM for grayscale images. (See the discussion on the PS conversion page.)
Copyright © 2005, 2006, 2010, 2021 Andrew T. Young
or the
graphics-format conversion page
or the website overview page